
Birthdays
There is nothing I love more than a good party. Birthdays are the best parties, they are a day specifically for you to be indulgent and celebrate. You get presents and a cake, all for surviving another year prancing about this planet. One day all about you. What a neat little system. This week was my friends Amanda's birthday and I love her to bits. Least of all because she had a costume party.

Now when it comes to gift I'm a romantic (and a poor staving student) so where possible I make my friends personal gifts. Anyone can buy someone soap but it takes care and time to make a perfect gift to show your friend you love them. Amanda loves the drink Baileys, so I decided to make Baileys Fudge. I found this recipe on www.mydish.co.uk which is really great website for finding easy to do home style recipes. I then tweaked it a little to suit my taste. This is really quite a simple recipe that isn't expensive, I've tried to explain it in as much detail I could to make its easier to follow.
From the left Me as Pikachu, Leigh as The Mad Hatter and Amanda the Birthday Girl as Alice in Wonderland.
Now when it comes to gift I'm a romantic (and a poor staving student) so where possible I make my friends personal gifts. Anyone can buy someone soap but it takes care and time to make a perfect gift to show your friend you love them. Amanda loves the drink Baileys, so I decided to make Baileys Fudge. I found this recipe on www.mydish.co.uk which is really great website for finding easy to do home style recipes. I then tweaked it a little to suit my taste. This is really quite a simple recipe that isn't expensive, I've tried to explain it in as much detail I could to make its easier to follow.
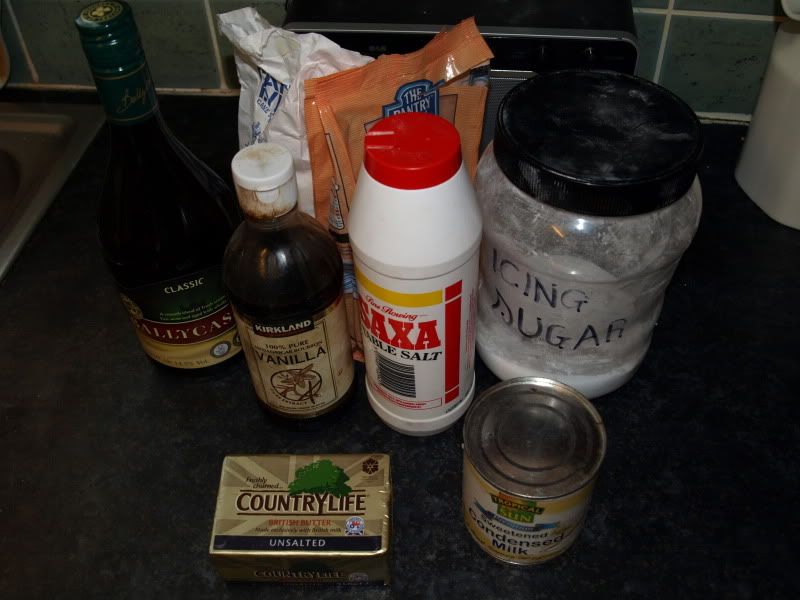
- 120ml evaporated milk or 100ml of condensed milk as I used.
- 200g white sugar (caster or granulated it really doesn’t matter)
- 200g brown sugar (I used light brown sugar for a flavor that isn’t too strong)
- 170g unsalted butter
- ¼ teaspoon salt
- 1 teaspoon Vanilla extract (Strong)
- 60ml baileys or Irish cream liquor
- 250g icing sugar
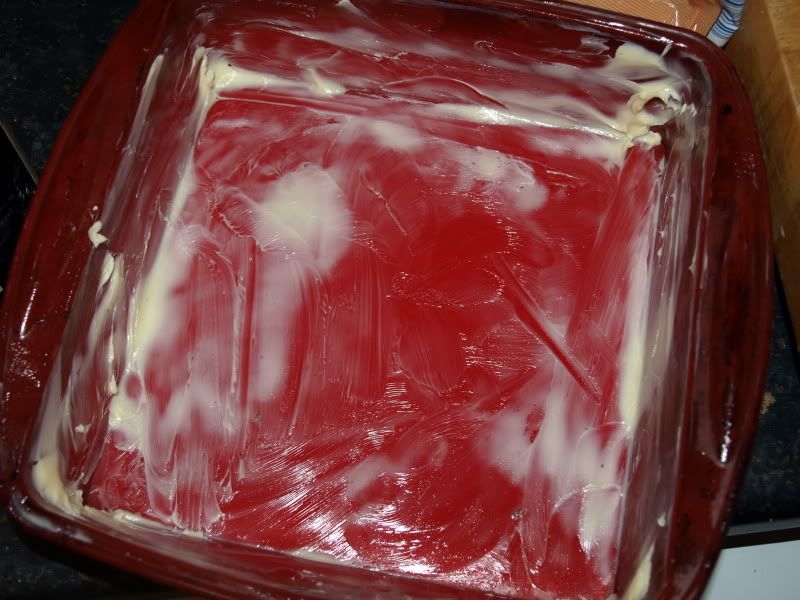
Grease a baking tray, metal or silicone it doesn’t matter, I’m using a silicone one because its slightly easier to get the fudge out when its solidified. This time I forgot to do this as rushed to do it while i was in the last stage, hence the haphazard look to the photograph.

Take a heavy bottomed pan, this helps spread the heat more evenly, and add the evaporated/condensed milk. I find it easier to measure if instead of pouring straight from the tin into your measuring jug if you spoon it in so you have more control. Always check your measurements at counter high instead of lifting them as you could be tipping the jug and making it inaccurate. Which would be a silly way to ruin tasty treats.

Once you’ve done that add the brown and white sugar, & salt. When it comes to measuring out the sugar, I don’t actually have a scale as I grew up estimating weights by sight so I used a tablespoon (the big ones not the type you eat with) and estimated that one is about 100g. It’s worked so far. Then add the vanilla, I use a great one that I bought in Costco for not that much money and its really quite good. I go through vanilla really quickly if its in one of those little bottles so it was really worth getting a large bottle.
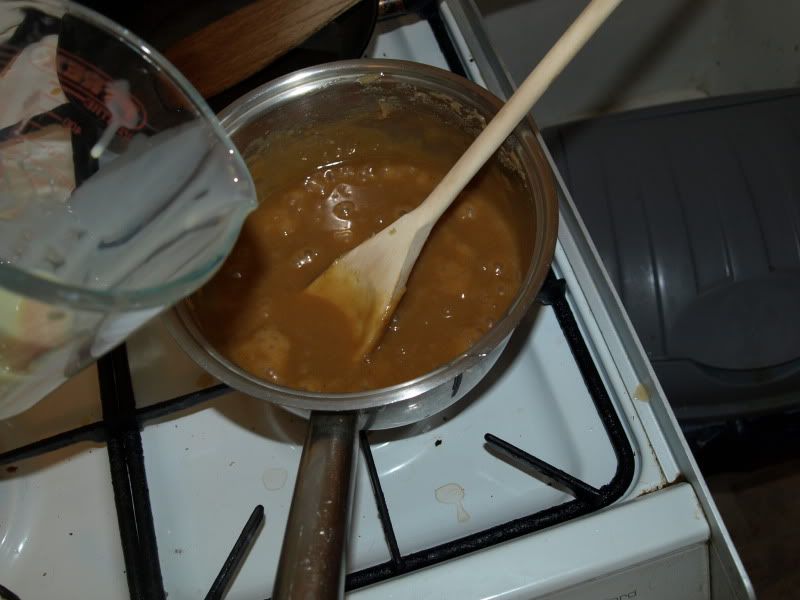
Then measure your butter, I find it easiest to do this if you use a butter that marks the weights on the foil but you can measure with a scale if you want. Then roughly cube the butter and place it evenly in the pan. Now add the pan to a medium heat and stir constantly. Use the same stirring technique that you would use for scrambled eggs as in scraping the edges and bottom of the pan so the mixture doesn’t stick and burn.
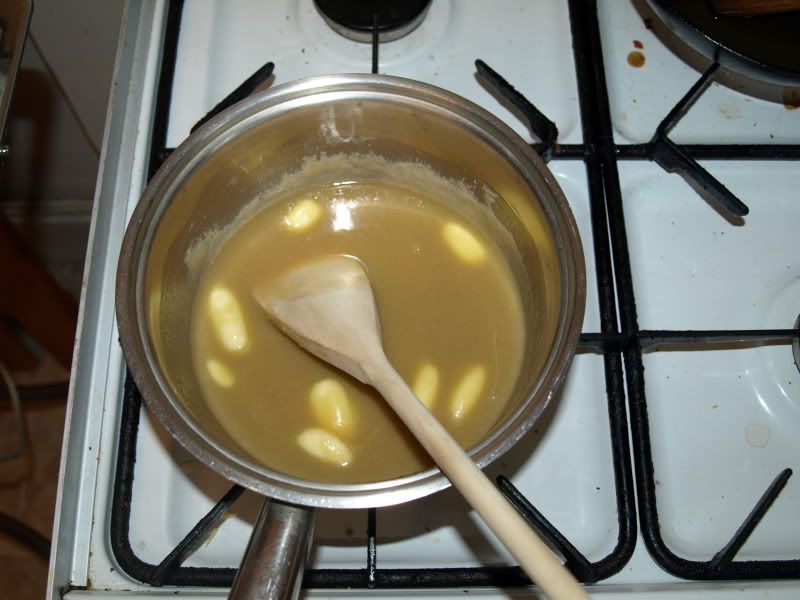
Heat until the mixture is at 238oF on a sugar thermometer, as I don’t have one of these I test, you can drop small amounts of the mixture into a small bowl of cold water, and when it is able to be shaped into a ball but is still soft, then its right. The bubbles should look sort of consistent
When you’ve reached this stage take the pan off the heat and pour in your baileys, be careful here as it will bubble up and hiss. There isn’t a picture of this stage because you have to stir quickly and I don’t have enough hands. The mixture should turn a slightly darker colour here. Then in small amounts at a time sift in the icing sugar, stirring each amount in vigorously until no white specks can be seen.
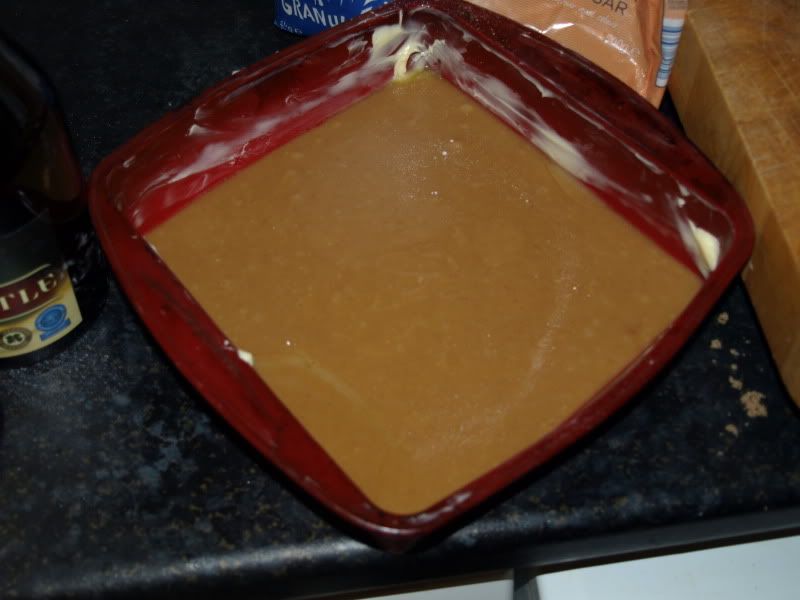
Then pour your mixture into your already greased tray and leave to set either over night or about an hour in the fridge. Then wait for the pan to cool to slightly warm and have a sneaky taste, then tidy up your mess :)
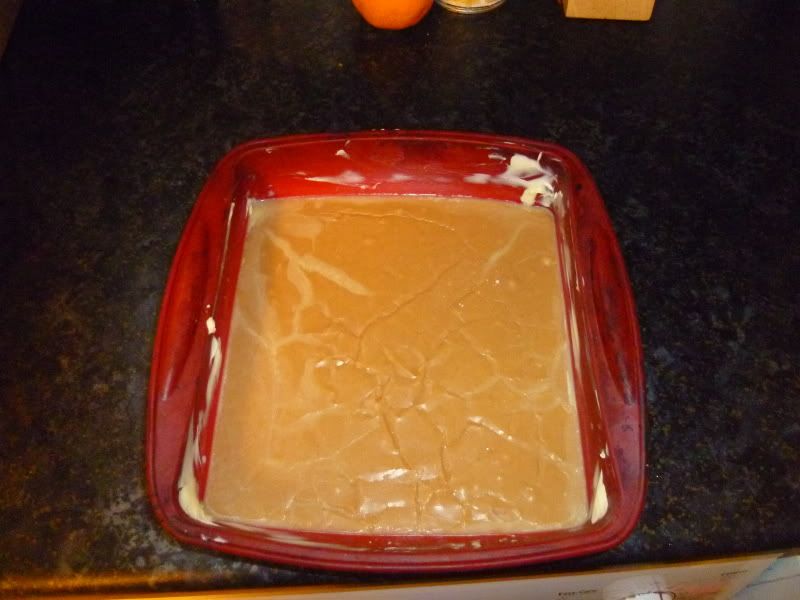
When it's dried the fudge should be completely solid. If there is any excess butter around the edges wipe it away with some kitchen roll, so that it doesn't get onto the fudge when you remove it from the tray. I did this after the next step but it meant little bits of it dropped onto the fudge.
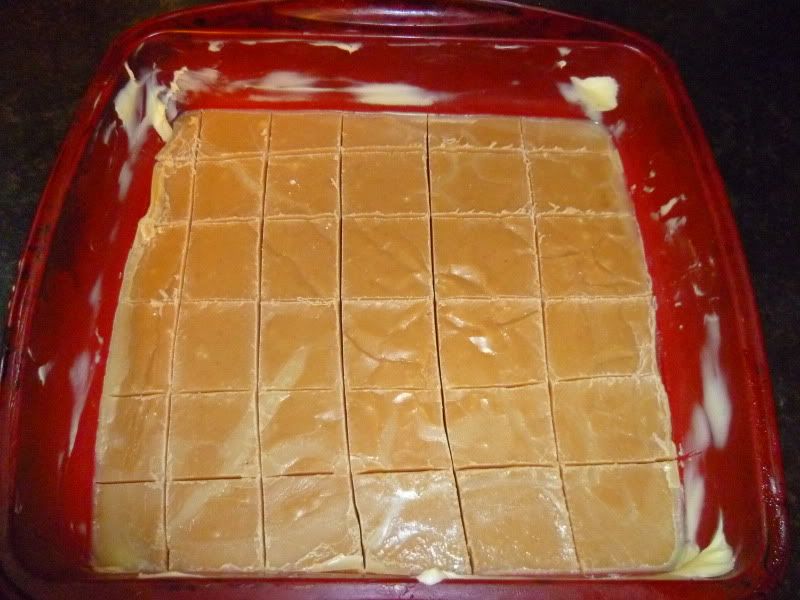
After you've done that take a flat edges knife and cut the fudge into squares, try to avoid scraping the bottom of tray as this could damage it. It doesn't matter if the pieces are irregular in size, you can also trim any edges that have be squished and destroy the evidence (nom nom nom)
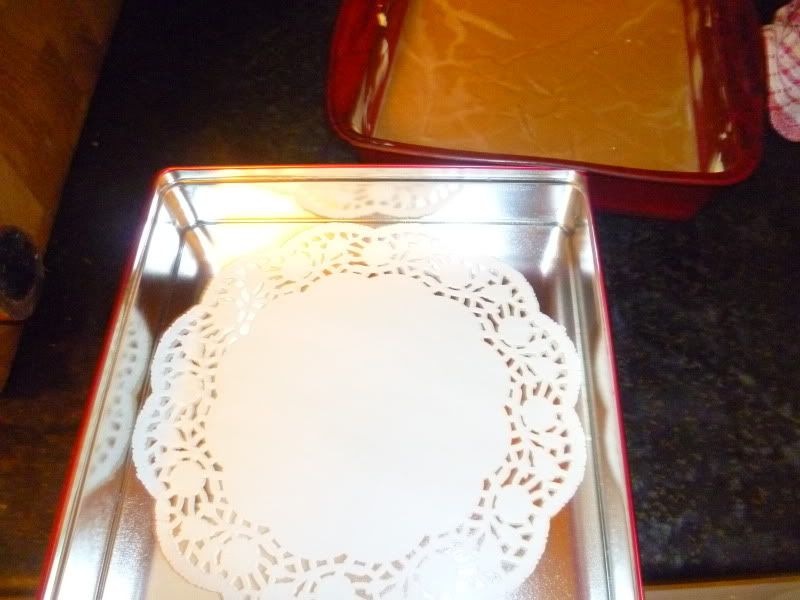
To present it I washed out a tin that came with biscuits, it's a good idea to keep hold of pretty tins and jars so that you can give them as gifts without giving your cake tins and waiting on getting them back. To make it look prettier I put a doily at the bottom of the tin. I love doilies they aren't expensive yet they add a gorgeous detail. With retro being in fashion at the moment you can get them in most home stores.
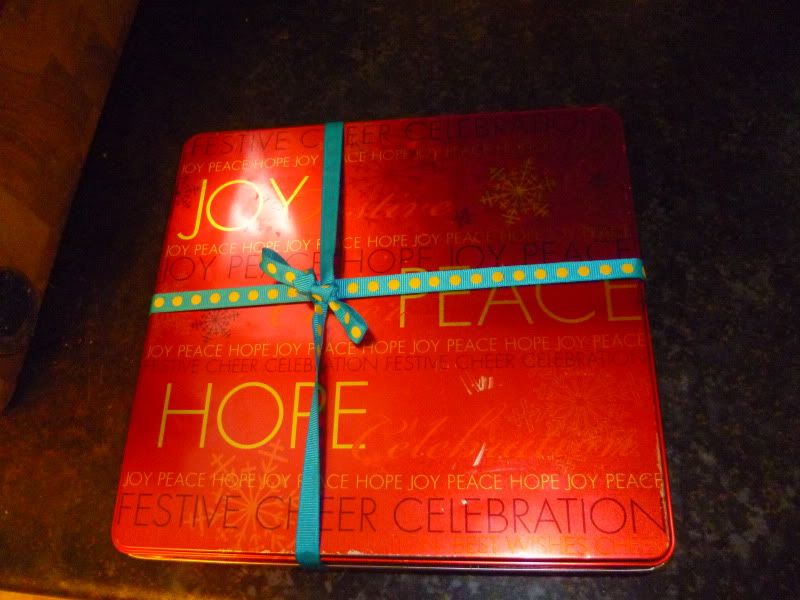
The last thing I did was fill the tin and tied a pretty little ribbon around it, I know that the aqua and the red don't exactly go together. I kind of like things that clash though... Amanda loved her present and was really happy I'd remembered her favorite things :) Want to show you love someone surprise them with delicious home made treats.
Yours
Belinda Stepford
xxx
No comments:
Post a Comment